Hello everyone,
Here’s a painting tutorial you probably never thought you’d see: how to paint Space Marines from the Imperial Harbingers chapter!
This tutorial was created by Sigur from Battle Brush Studio and offers a relatively simple, step-by-step approach to bring this mysterious and unique chapter to life.
We start with the primer of your choice, then apply a coat of medium grey over it.


… followed by a coat of Greyseer Grey from Citadel (or any other lighter, slightly warmer grey).
This was applied using an airbrush, but you can also use regular brush techniques or dry brushing. The goal is to add subtle highlights to the underlying grey and shift the color toward a lighter, warmer tone.
Then, apply a black wash over the entire miniature to really bring out the details.


It might look a bit messy for now, but we’ll fix that right away by applying an even lighter gray by hand.
This step helps correct any overflow caused by the wash while adding some good old highlights. Deepening the shadows with a wash and then brightening the raised, light-exposed surfaces creates a nice contrast and really brings out the miniature’s shapes and details.
You can take this step as far as you like, but before that, it’s time to add the second color that really makes a difference in this scheme: yellow!
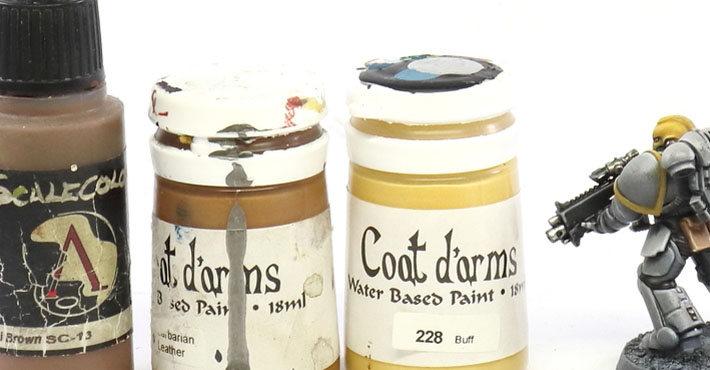
I like to use the shade from Vallejo’s Extra Opaque range.
This step is also used to carry out the essential (and somewhat tedious) task of blacklining and to apply the black base coat on certain parts, such as the pipes at the joints of the armor’s arms and legs, some details, the helmet tubes, the eye lenses, and anything related to them.


Now let’s move on to something more interesting, let’s work on that base yellow a bit. Take some white and start lightening the yellow by adding highlights.
It might look a bit rough at first, but don’t worry, we’re now going to blend everything together with a nice yellow, not too light and not too thinned down.


To further soften and unify the overall look, apply an orange wash, slightly light brown, mixed with a bit of yellow ink (or paint), depending on your preference.
This wash will shade the yellow areas, tone them down a bit, give them a tint according to your taste, and much more.
As always, after applying the shadows, add highlights again to bring some brightness and pop, using the same yellow as before mixed with a bit of white.

With that, the base colors are mostly done, and we can move on to the details. Apply a light black wash to the metallic parts of the bolter and elsewhere. The eye lenses deserve special attention: start with a dark red base, add red highlights, finish with lighter touches, and finally add a small white dot to simulate reflection, classic but effective. Lastly, the Aquila on the bolter gets a gold base coat.
The gold parts then receive a brown wash, followed by gold highlights if needed.
There are still two major steps left: the essential highlights on the black areas (mainly the bolter casing in this case, as well as the tube connectors at the joints of the arms and legs). Mix a medium gray, then carefully apply highlights along the edges (add a bit of black to the mix if the gray seems too light). Then, add a touch of white to strengthen the brightest points on the angles.
Silver playfully makes its appearance to brighten up the metallic silver parts. If you like, you can also use it to add a very precise highlight on the golden double-headed eagle on the bolter casing. A tiny dot of bright silver will give a subtle gleam to the gold, while applying too much, especially on the top edges, can overpower the gold and make it look clumsy. So, proceed with delicacy.


Another small detail has also been completed: the parchment on the purity seal. Everyone has their own method for this, but generally you start with a dark bone tone, add some highlights (and optionally a wash, followed by more highlights if desired), then draw a few tiny wavy lines to simulate miniature writing.
We’re now approaching the finish line. Let’s add one last small color detail to liven up the miniature. I chose to paint the helmet tubes turquoise, start with a blue-green base, then highlight with white, and that’s it.
Finally, there’s one last detail: the various pouches worn by the Space Marines.
For these, I chose warm, light browns to contrast with the cool gray used for the main parts of the armor. Start with a medium brown base, add highlights in a lighter brown, then finish with yellow-orange touches to maintain a warm tone.
The result is far more appealing than black pouches with blue-gray highlights.


After that, all that’s left is to add the decals and finish the base.
If you like, you can then add battle damage, dirt, rust, wear marks, and so on.
Repeat these steps about a hundred times, and voilà, your Imperial Harbingers army is ready for battle!
We hope you enjoyed this brief tutorial. It mainly guides you on color choices, with references visible in the photos.
However, you’re free to use similar shades from other brands, as we understand that the references shown here might not always be the most common or accessible.
Don’t missed to support us on PATREON!
At the bottom of each post, you’ll find a list of all related blog entries, which we’ll update as the project evolves.
- Space Marines Project – Imperial Harbingers
- Space Marines Project – Imperial Harbingers Boarding Strike
- Space Marines Project – Imperial Harbingers Squad Reinforcement
- Tuto : How to Paint an Imperial Harbingers
- Space Marines Project – Imperial Harbingers Veteran Reinforcements
- Space Marines Project – Imperial Harbingers Lieutenant Amulius
- Space Marines Project – Imperial Harbingers Lieutenant
- Space Marines Project – Imperial Harbingers Chaplain
- Space Marines Project – Imperial Harbingers Redemptor Dreadnought
- Space Marines Project – Imperial Harbingers Combat Patrol
- Space Marines Project – Imperial Harbingers Judiciar
- Space Marines Project – Indomitus Imperial Harbingers
- Space Marines Project – Imperial Harbingers Chaplain on Bike
- Coming soon…
Questions, ideas, spelling error or just want to share your thoughts? Leave a comment below! And if you enjoy our work, a little support would help us keep creating more and more content.
See you soon!