Hello everyone!
Welcome to this tuto : “How to Paint an Power Blade.” This article will walk you through a method for painting this type of weapon, complete with images (shown here on a Grey Knight). I hope this helps you customize and enhance your armies. I was particularly pleased with the result, and now I consistently use this method for all my “non-metallic” blades. I use a wet palette for painting, as these palettes have the advantage of drying much more slowly.
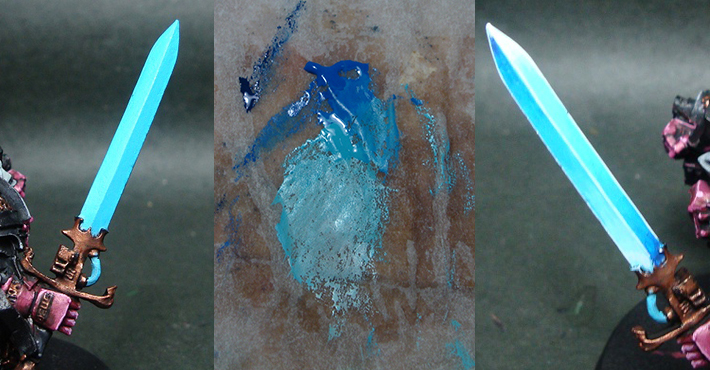
Step 1: Apply a smooth, even coat of light blue (such as Lothern Blue or Ice Blue).
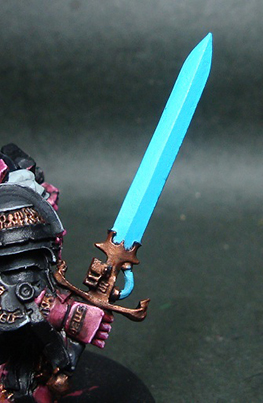

Step 2 : Start highlighting the light blue by gradually blending it toward white. (Personally, I use my favorite color for this : Ivory from Prince August, or Vallejo depending on your region.) Continue until you achieve a very pale, slightly bluish white.
Step 3 : Now it’s time to darken the light blue using a darker blue (such as Enchanted Blue or Caledor Sky from GW). Since each side of the blade has two well-defined facets, this makes the task easier. Start by darkening the left facet toward the top and the right facet toward the bottom (or the other way around, depending on your preference). Then, repeat the same process on the other side of the blade.
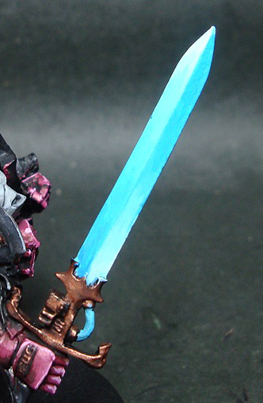
Step 4 : Next, continue with a smooth gradient leading into pure Enchanted Blue. By this stage, the sword blade is really starting to take shape, and the volumes are now clearly visible.
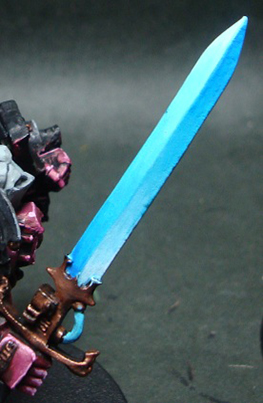
Step 5 : Continue darkening the blade by adding a touch of dark blue (such as Kantor Blue) to your mix. Gradually build it up until you reach pure dark blue on the outermost areas. Be careful not to overdo it -use it sparingly, or the dark blue may overpower the other blue tones.

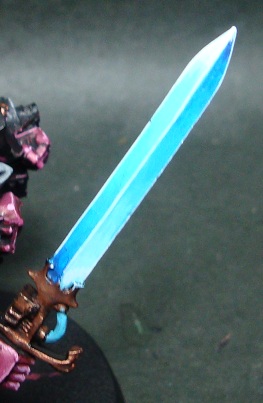
Step 6 : Using a fine brush and a very light touch, draw a thin line of pure white along all the edges to give the blade its final sense of volume.
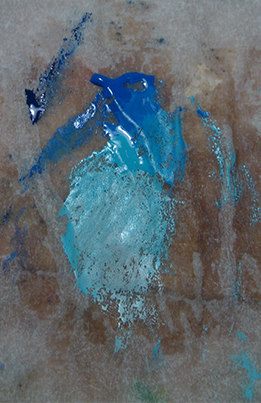
Here’s what my wet palette looks like at the end of the process (very handy for any touch-ups in case of paint spilling over).
This technique is simple on swords, but it can also be applied to other types of blades, such as halberds, hammers, or more exotic weapon shapes.
Of course, you can follow this tutorial using other colors like red or green (the principle remains the same : build up shadows and highlights in two opposite directions on adjacent surfaces).
I hope this little illustrated guide proves helpful and/or inspires you!
Don’t missed to support us on PATREON!
Questions, ideas, spelling error or just want to share your thoughts? Leave a comment below! And if you enjoy our work, a little support would help us keep creating more and more content.
See you soon!