Hello everyone,
After creating a painting tutorial for a Plague Marine in the colors of the Apostles of Contagion, we are now offering a method to bring your hordes of rotters to life.
Of course, this is just one approach among many, but it is the one Sigur from Battlebrushstudio used.
After cleaning and assembling the miniature, and adding sand to the base, I move on to the undercoat stage, a dark green that will serve as the foundation for the entire paint job. I personally chose Vallejo’s Russian Green 4BO, but any dark primer will do, black, brown, it doesn’t matter. If you opt for a dark brown, the final result will simply have a warmer tone, which can give a slightly different but equally nice style.


For the next step, I apply a coat of Vallejo Light Brown Air (VMA) with an airbrush. If you don’t have one, no problem, you can do this step with a brush, simply lightening the areas most exposed to light. Don’t worry if the texture looks a bit rough or if you don’t have the exact shade; any light brown or sand tone will work perfectly. Notice that I barely touched the feet and legs: these areas remain in shadow, and after all, painting 28 mm miniatures is mostly about playing with contrasts, right?
At this stage, I apply a dry brush of white paint. To do this, take a large, soft brush, load it lightly with paint, wipe off the excess on a paper towel, and then gently brush the edges and raised areas of the miniature. There are also many online tutorials detailing this technique if you want to refer to them. Alternatively, if you prefer a more precise result, you can add a few highlights of pure white with a brush on the areas most exposed to light, this will enhance the contrast for the next step.


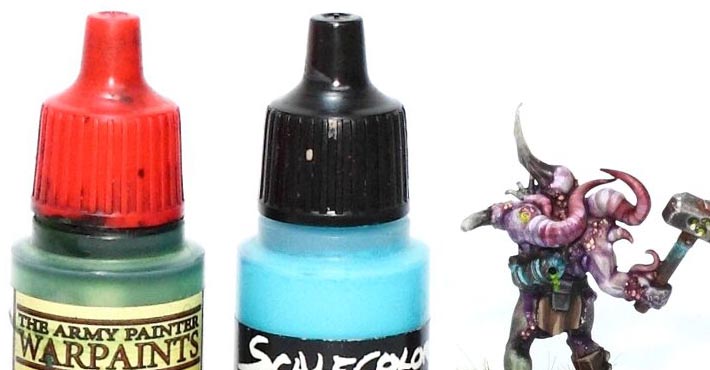
These first steps are the same as in my painting guide for Plague Marines, a happy coincidence, isn’t it? At least it has the advantage of saving you extra work when painting an entire army. The next step is just one approach among many, a simple glimpse into my way of doing things. You don’t have to follow the exact paints or colors I use. On the contrary, I strongly encourage you to vary the shades and areas of application from one Poxwalker to another, after all, they are all unique and delightfully disgusting creatures. For this Poxwalker, I use different washes. Army Painter offers some excellent options, but use whatever you have on hand! Feel free to mix your washes together, or even with a little paint and water (and yes, this is important: always add a bit of water to everything). Then apply your mixtures directly to the miniature. Don’t worry if the result looks random or if you spill a little onto the equipment, that’s completely normal at this stage.
As you can see, I mainly use red, purple, and green, simply because these colors provide a very interesting contrast. The only real caution is to avoid overmixing the washes; otherwise, you’ll quickly end up with an unflattering muddy brown-black tone. You can apply one color, let it dry, then add others in different areas and gently blend them where they meet. This method takes a little more time, but it’s safer. On the other hand, if you’re comfortable with how washes behave, you can try “wet-on-wet” blending, that is, working the colors while they’re still wet. This is obviously faster, but it requires some practice and control. And a little tip: avoid using a hairdryer at this stage! With so many washes on the miniature, you could easily blow everything around… and trust me, that’s not the kind of texture you want. Not cool.


For the next step, I paint the hammer handle and other small details with a dark metallic shade, such as dark copper or tin. These tones provide an interesting contrast with the flesh and organic colors of the rest of the miniature, while maintaining the dirty, corroded feel typical of Nurgle’s servants.
At this stage, the washes applied to the skin should be completely dry. I then use a bit of black to slightly dull the silver metals and give the model more definition where needed. Next, take a moment to evaluate the overall look of the skin: identify areas that could benefit from a little more depth, and then apply an additional layer of wash in the deepest shadows. You can also use a darker tone, a thinned paint, a contrast wash, or simply whatever seems most appropriate to you to enhance the volumes and transitions.


Now, time for some rust! On this model, there isn’t much to treat, since only the hammerhead shows signs of oxidation. For this, I use a mix of dark brown wash and a rusty red. Personally, I really like Rackham paints (yes, this range still has some gems!), because they become very matte and slightly grainy when dry, perfect for simulating corroded metal texture. I also really like the tone of their colors. So, mix your dark brown wash with your rusty shade and apply it to your liking: in the deepest recesses, on damaged metal areas, or just to add a few spots of corrosion here and there. Of course, feel free to use the products you prefer, the key is the final effect.
I usually proceed in two steps:
- First, a dark, well-diluted layer to lay down the base of the rust;
- Then a brighter tone (shiny rust) on the most pronounced areas and the deepest recesses.
Technically, there’s nothing stopping you from going further: add several successive layers, or even a touch of orange or yellow to your final mix to enhance the effect of advanced corrosion.
Now, let’s move on to the copper and tin parts, like the hammer handle, belt buckles, and a small amulet located in the angular area of the Poxwalker. I mix turquoise paint with a wash, green, brown, or black, and then apply the same technique we used for the silver metal.


Now, add a bit of white to your mix, then apply it to the deepest recesses and the areas most exposed to the elements. It’s up to you to decide how far you want to push the contrast. Always keep in mind that your figure will be viewed on a gaming table, usually dark and at an arm’s length or more, and that table lighting is rarely as bright as a dedicated painting desk.
After applying all these vibrant colors, we return to good old black paint for the details and pouches. At this stage, I also paint the eyes and teeth in black.


You can immediately highlight the areas that are still black by making simple highlights with a mix of black and white. This is how I paint the belts and pouches located on the chest. For the loincloth and shin guards, I first apply a dark brown base coat (VMC Chocolate Brown), then immediately highlight it with a mix of this brown and white.
I then finish with a brown wash on the loincloth and shin guards. While the wash is drying, I paint the teeth in white, off-white, yellowish white, or greenish white, depending on the effect you want to achieve.


Next, I finish the metallic areas with a very light silver color, such as Games Workshop’s Runefang Steel. I apply a few touches on the most exposed parts, for example the hammerhead. Be careful not to overdo it on the tin elements, otherwise they might end up looking like silver. At this stage, I also paint the buttons and other small details.
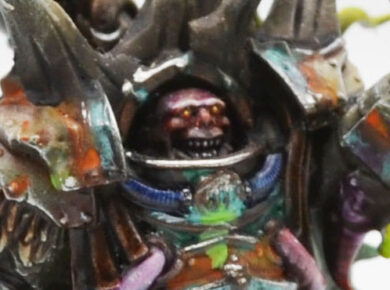
Now, let’s move on to the final details. I start with the eyes, since it’s a simple and enjoyable step. The eyeballs have already been painted black, so I cover them with red, then add a small pale yellow dot to bring the gaze to life. At this stage, I also apply a light red wash around the vesicles and bumps on the skin to enhance the details and relief.


In preparation for the next step, apply a small dot of pale yellow on the tops of pustules, bumps, and blisters, regardless of their exact nature. If you like, you can do a bit of research on what these elements look like in real life (tip: observe reality rather than just copying other people’s painting techniques). It’s best to do this research before sitting down to a big meal.
Finally, let’s add a bit of glowing green slime! This step is really simple and fun: just mix glossy varnish with green and yellow. You can apply it wherever you like and in whatever amount you want, adjusting the density and viscosity to your preference. In general, I look for spots where the slime can “ooze” naturally while harmoniously blending with the overall color balance of the figure.

That concludes this tutorial! All that’s left is to create the base, matching the style and colors of your army.

Don’t forget to follow us on social media to stay up to date with our latest updates and support our ongoing projects!
Don’t missed to support us on PATREON!
At the bottom of each post, you’ll find a list of all related blog entries, which we’ll update as the project evolves.
- Death Guard Project – Apostles of Contagion
- Death Guard Project : List of Arch-Contaminators
- How to paint an Apostles of Contagion
- Death Guard Project : First Combat Patrol
- Death Guard Project : Mechanical Reinforcements
- Tuto : How to Paint a Poxwalker
- Death Guard Project : Mamon The Arch-Corruptor of Vraks
- Death Guard Project : A Second Daemon Prince of Nurgle
- Death Guard Project : Helbrute
- Death Guard Project : Winged Daemon Prince
- Death Guard Project : Foetid Bloat-drone
- Death Guard Project : Necrosius the Undying
- Death Guard Project : Chaos Lord In Terminator Armour
- Death Guard Project : Trio of Malignant Plaguecaster
- Death Guard Project : Foetid Bloat-Drone with fleshmower
- Death Guard Project : Noxious Blightbringer
- Death Guard Project : Nurgle Blight Drone Trio
- Death Guard Project : Blightlord Terminators 2
- Death Guard Project : Foul Blightspawn
- Death Guard Project : Lord of Contagion and Deathshroud Terminators
- Comming soon…
Questions, ideas, spelling error or just want to share your thoughts? Leave a comment below! And if you enjoy our work, a little support would help us keep creating more and more content.
See you soon!