Hello everyone,
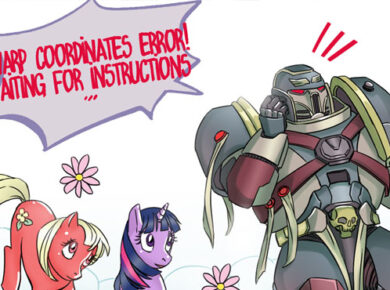
We’re continuing here in the same vein as Chapter 1, Chapter 2, and Chapter 3 with this fourth article dedicated to combat actions. Conquest, like any good regiment wargame, doesn’t shy away from intense close-quarter clashes, where your stands can quickly vanish.
Overall, each unit has a high lethality potential, meaning that every strategic decision or oversight, can have serious consequences. A poor choice can quickly make itself felt on the battlefield!
Clash Action
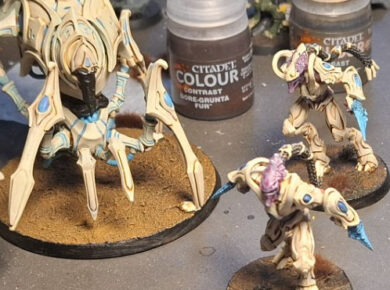
Close combat is one of the most intense and decisive moments in a game of wargame. The Clash action represents this brutal phase where units engage each other directly. But to make the most of it, you need to understand its nuances. Here’s a breakdown of the key elements.
A Regiment can declare a Clash action as soon as it is in contact with an enemy unit. In this context, we distinguish between two types of stands:
- Engaged Stands, which are in direct contact with the enemy, perform their full set of Attacks based on their Attacks characteristic.
- Unengaged Stands, positioned behind the front line, can still contribute by providing Support Attacks, typically 1 attack per Stand, unless modified by rules such as Support (X).
Note: An Engaged Stand can never make a Support Attack.
Once the total number of Attacks has been determined, you proceed to the To Hit roll. For each Attack, roll one die : any result equal to or less than the Regiment’s Clash characteristic is a Hit. If the Clash value is 6 or higher, the unit gains the Relentless Blows special rule, making it even deadlier in combat.
The opponent then responds with a Defense Roll. For each Hit taken, they roll one die and compare the result to their Defense and Evasion values. If the roll is equal to or lower than either, the Hit is blocked. Otherwise, the unit suffers a Wound. Certain special rules can modify this step. For example, Smite, which reduces a unit’s Defense to 0, making successful saves much harder to achieve.
Clashes can also become more complex when a Regiment is in contact with multiple enemy units. In such cases, each Engaged Stand must direct all of its Attacks toward a single enemy Regiment of your choice, splitting attacks is not allowed. Support Attacks follow the same rule: a supporting Stand may only target one enemy Regiment.
Finally, a word on flank and rear attacks, which are always particularly powerful : they force the enemy to re-roll successful Morale Tests. A unit caught off guard from the side or behind is much more likely to panic, something that can quickly tip the balance of a battle in your favor.

Special Combat Actions
Beyond straightforward frontal assaults, the combat rules offer players a wide range of tactical actions that can turn the tide of a battle. Rallying, reforming, inspiring… Here’s an overview of the key combat actions you need to know to gain the upper hand over your opponents.
Combat Rally : Take back control
When a Regiment is in a Broken state, it can perform a Combat Rally action. This represents an attempt to regroup amid the chaos. If the unit chooses this action, it immediately loses the Broken status: the marker is removed, and it can act normally again from its next turn.
Combat Reform : Reform while in contact
Sometimes a Regiment needs to reform in the heat of battle to optimize its positioning or bring more stands into contact with the enemy. This is where the Combat Reform action comes into play.
To perform it, you roll a die:
- If the result is less than or equal to the highest Resolve characteristic of the unit, the reform is considered Clean Reform. The Regiment can then adopt a new legal formation and pivot to face the enemy without suffering any penalty.
- If the roll fails, the reform becomes Fighting Reform: the unit suffers 1 Wound for each stand in contact with the enemy but can still adopt its new formation after resolving casualties.
Warning : Regardless of the type of reform, the unit cannot change its facing relative to the engaged enemy unit.
Inspire : Inspire the troops
The Inspire action allows a Regiment to surpass itself. Until the end of its activation, it gains the Inspired special rule, which boosts its offensive capabilities:
- If its Clash characteristic is less than 5, it increases by +1.
- If it is already 5 or higher, the Regiment may re-roll unmodified hit rolls of 6.
This action is usually taken before an attack and helps maximize offensive output, especially for basic units with a modest Clash value.
Withdraw : Withdraw in style (or not)
Sometimes, it’s better to fall back than to die on the spot. The Withdraw action allows a Light or Medium unit to disengage from combat.
Roll a die:
- A successful roll (less than or equal to the unit’s highest Resolve) triggers a Clean Withdrawal, at the cost of D6 Wounds.
- If the roll fails, the withdrawal becomes Fighting Withdrawal and is more costly: the unit suffers D6 Wounds for each Stand in contact with the enemy.
In both cases, after wounds and morale tests, the unit may reform and perform an immediate March to move away, provided it does not end its movement within 1″ of an enemy. Otherwise, the withdrawal fails, and the unit remains in place.
Pass : The art of doing nothing… to act better
Finally, a Regiment or a character can simply choose to Pass. This means they take no action but are still considered activated.
This can be useful to wait for a better opportunity, force your opponent to reveal their plans, or simply because there’s nothing better to do at that moment. Characters embedded within units also have an activation card, which can be used to delay their action and strike at the most opportune time.
As with out-of-combat actions, each of the combat actions we’ve discussed offers valuable tactical options. Whether it’s reorganizing your lines, inspiring your troops, or making a strategic withdrawal, these actions add real depth and flexibility to every game. The key is to remember to use them during play… Forgetting a crucial action can clearly turn the tide of battle. In other words, memory and experience will be your best allies to seize these opportunities.
We’ll meet again soon for Chapter 5, covering damage allocation.
Don’t missed to support us on PATREON!
At the bottom of each post, you’ll find a list of all related blog entries, which we’ll update as the project evolves.
- Reviews : Conquest The Last Argument of Kings Chapter 1
- Reviews : Conquest The Last Argument of Kings Chapter 2
- Reviews : Conquest The Last Argument of Kings Chapter 3
- Reviews : Conquest The Last Argument of Kings Chapter 4
- Reviews : Conquest The Last Argument of Kings Chapter 5
- Reviews : Conquest The Last Argument of Kings Chapter 6
- Reviews : Conquest The Last Argument of Kings Chapter 7
- Reviews : Conquest The Last Argument of Kings Chapter 8
- Reviews : Conquest The Last Argument of Kings Chapter 9
- Reviews : Conquest The Last Argument of Kings Chapter 10
- Reviews : Conquest The Last Argument of Kings Chapter 11
- Reviews : Conquest The Last Argument of Kings Chapter 12
Questions, ideas, spelling error or just want to share your thoughts? Leave a comment below! And if you enjoy our work, a little support would help us keep creating more and more content.
See you soon!