Hello everyone,
Welcome to the third installment of our article series dedicated to Conquest: The Last Argument of Kings. After exploring the core rules and fundamental mechanics, we now dive into a more substantial chapter: non-combat actions.
Often less flashy than heroic charges or bloody duels, these actions are nonetheless crucial for gaining a tactical edge on the battlefield. They form the strategic backbone of unit positioning and regiment management. If you came across this article first, make sure to read Chapter 1 and Chapter 2 first.
March Action in Conquest
In Conquest: The Last Argument of Kings, the March action allows a unit to move up to its March value in inches. It is the only action a regiment may repeat multiple times in a turn (unless otherwise specified by a special rule). A regiment may only March if it is not engaged in melee combat. If it is in contact with an enemy unit, it must perform a Withdraw action instead.
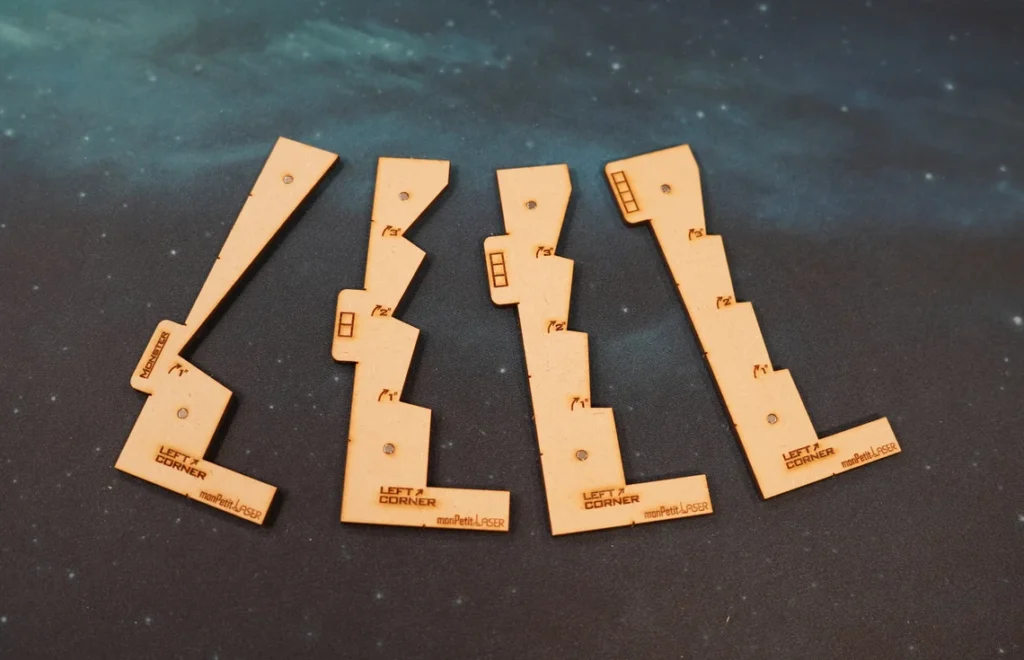
Movement is usually carried out in a straight line, but the unit may also perform a pivot (called a Wheel) around one of its front corners to change direction. The pivot distance is measured from the opposite corner, and a unit can pivot multiple times during the same movement, as long as the total distance traveled does not exceed the lowest March value among the unit’s stands. These pivots are a core part of the game’s tactical depth, but they can sometimes be tricky to execute with precision. That’s why we strongly recommend using movement templates designed to match the size of your bases, which will help you perform these maneuvers accurately and without measuring errors. The templates shown below were made by MonPetitLaser, but other Suppliers must be available.
A unit may also move sideways or backwards, but only up to half of its March value. It’s important to note that during a single March action, a unit cannot combine multiple directions (e.g., moving forward then backward).
A unit may move through friendly units, as long as those units are not in contact with enemy units. Additionally, the unit must have enough movement distance to completely exit the friendly unit it is passing through. If this cannot be done in a single March action, a second March action may be used to complete the movement properly. A regiment may never March within 1″ of an enemy unit or enemy-occupied terrain. It is also not allowed to move through enemy units, engaged friendly units, or buildings held by the enemy.
Reinforcements and the Reinforcement Line
Units in Reinforcements enter the battlefield through the Reinforcement Zone (the player’s table edge), by placing the front of their regiment flush against the edge and performing one or two March actions to move onto the board. They may also enter from the flanking edges, but only between the Reinforcement Zone and the Reinforcement Line, a dynamic line that marks the player’s secured area. This line is recalculated at the start of each turn based on the position of friendly and enemy units. If an enemy unit crosses it, the line moves backward.
If a unit is unable to enter the battlefield due to blocked positioning, it is returned to Reinforcements and will automatically reattempt entry on the next turn — no roll required. This mobile deployment line adds real strategic depth to the game. Advancing quickly with a unit to block enemy reinforcements and push back their line can allow your own troops to penetrate deeper into the battlefield. This opens up opportunities for dramatic turnarounds, allowing you to plan bold moves in advance that can shift the tide of battle.
The Charge
Charging is the only way for a unit to make contact with an enemy and engage in melee combat (Clash). It’s a tactical and risky mechanic that requires careful planning and good anticipation.
Declaring a Charge & Charge Distance
To declare a charge, the target must be within the unit’s front arc and within its line of sight. Only one target may be chosen.
Roll 1D6 and add it to the unit’s lowest March value, this gives the charge distance.
- If this distance is equal to or greater than the distance to the enemy, the charge succeeds.
- If it is less, the charge fails.
Warning! A unit that arrived as reinforcement this turn cannot charge.
When the unit reaches its target, it performs a final pivot to “close the door” and align its bases with those of the enemy. If this is impossible due to terrain or other units, the charge may fail or force the opponent to reposition within certain limits (up to 1″).
If the charge fails (due to distance or blockage), the unit advances only by the dice roll result (not the total) and stops 1″ away from any enemy unit or occupied terrain. It loses all its other actions for the turn. In more complex failure cases (illegal overlapping, blockage by terrain or other units), forced retreat or repositioning movements may occur, and the unit may even be assigned the “Broken” status.
Which flank is charged? The facing (side of contact) is determined by the majority of the unit’s front-line bases at the moment of the declaration. If there is a tie, the player may choose the flank.
Charge special rules
- A unit that successfully completes a charge automatically gains the Inspired status (a bonus to its next Clash Action).
- Some units have impact hits (e.g., heavy cavalry). These attacks are resolved immediately after the charge and allow damage to be inflicted even before the Clash.

Support and Repositioning Actions
In Conquest, it’s not all about charges and combat. Some actions provide valuable tools to optimize your units, restore their condition, or adjust your formation during the game. Here’s an overview of three key actions that are often strategically crucial.
Take Aim
The Take Aim action allows a shooting unit to gain the special rule Aimed Shot until the end of its activation. This grants improved accuracy for its ranged attacks, perfect for maximizing the impact of a well-placed volley.
Rally
Only units with the Broken status can perform a Rally. By taking this action, they immediately lose the Broken status, allowing them to return to the game.
Reform
The Reform action allows a unit to change its formation, meaning how its bases are arranged in ranks and files. This action is carried out in two steps:
- Repositioning the bases without exceeding the unit’s March value, to adopt a new legal formation.
- Rotation in place up to 180°, without moving the unit’s center. This allows the unit to change its orientation without leaving the occupied area.
These actions provide a significant tactical advantage and clearly deserve to be incorporated into your gameplay. Their impact is strongly felt on the battlefield. In my opinion, this is one of the most important aspects to remember when starting out with Conquest. It’s common to overlook these options during your first games, but quickly making them part of your instinctive play will truly help you improve.
Volley action
The Volley Action allows a non-engaged regiment to shoot at a distance, provided that at least one of its front-line bases has the special Barrage (X) rule.
Target Selection and Line of Sight
- A Volley can only be declared if at least one base of the regiment’s target is within Barrage range and in its line of sight.
- All shots must be directed at the same enemy regiment; dividing shots among multiple targets is not allowed.
Obstruction
For each stand in the front rank, trace a straight line toward an enemy stand :
- If the line is blocked by terrain or a unit whose size is equal to or larger than both regiments involved, the shot is obstructed and does not count.
- If the line is clear, the base makes a clean shot.
Effective Range
- If the target is within less than half of the Barrage (X) range, the base gains a +1 to its Barrage value, representing an optimal range.
- Each base is checked individually to see if it benefits from this bonus.
Shots from multiple arcs
- If a target regiment is engaged on multiple arcs (front, flanks, rear), each stand fires into the arc it occupies.
- Effects (e.g., loss of shield bonus on the flank/rear) apply per arc.
Shots and Resolution
- Each unobstructed frontline base rolls a number of dice equal to its Barrage value (X).
- Add the bonuses (e.g., effective range) and apply any penalties (e.g., loose formation, obscuring terrain).
- A roll equal to or less than the Volley characteristic is a hit. If this characteristic is 6 or higher, the special rule Rapid Fire applies: each 1 inflicts 2 hits.
Defense roll
The opponent rolls a die for each wound suffered. A roll less than or equal to the Defense or Evasion cancels the wound. Otherwise, the regiment takes a wound. Unlike other rolls, a 1 is not an automatic success here.
Casualties and Morale
Wounds are counted and casualties removed according to standard rules. However, Volley fire does not cause a Morale test.
So we have finished with this rather dense Chapter 3. Most of the mechanics are relatively simple, and the dice rolls don’t raise too many questions, which makes the game smooth and intuitive. As mentioned earlier, it’s mainly the different actions that need to be well understood to optimize your army on the battlefield. Nothing inaccessible here: players with a good memory will quickly get the hang of it, and for others, a few practice games will be enough to develop the necessary automatisms
We’ll be back soon with Chapter 4, covering combat.
Don’t missed to support us on PATREON!
At the bottom of each post, you’ll find a list of all related blog entries, which we’ll update as the project evolves.
- Reviews : Conquest The Last Argument of Kings Chapter 1
- Reviews : Conquest The Last Argument of Kings Chapter 2
- Reviews : Conquest The Last Argument of Kings Chapter 3
- Reviews : Conquest The Last Argument of Kings Chapter 4
- Reviews : Conquest The Last Argument of Kings Chapter 5
- Reviews : Conquest The Last Argument of Kings Chapter 6
- Reviews : Conquest The Last Argument of Kings Chapter 7
- Reviews : Conquest The Last Argument of Kings Chapter 8
- Reviews : Conquest The Last Argument of Kings Chapter 9
- Reviews : Conquest The Last Argument of Kings Chapter 10
- Reviews : Conquest The Last Argument of Kings Chapter 11
- Reviews : Conquest The Last Argument of Kings Chapter 12
Questions, ideas, spelling error or just want to share your thoughts? Leave a comment below! And if you enjoy our work, a little support would help us keep creating more and more content.
See you soon!